Heather Oliver shares her top tips for a straightforward UFH installation
There’s no reason why installing underfloor heating (UFH) should be complicated, even if you’re new to it. The majority of UFH comes with clear instructions, schematic set ups, and suppliers even calculate heat losses and can guarantee its performance – a benefit that very few other solutions offer.
First and foremost, a good system design is key, even for those installers who have been working with UFH for years. A quality design will always consider:
• Room-by-room heat loss calculations to guarantee performance
This means that, in effect, every room has its own design to ensure it can reach the desired temperature. If one space is flagged as having a high heat loss, the system designer will tell you if it will require a supplementary heat source such as a log burner for colder days. Most suppliers will design their UFH systems to reach a certain temperature throughout the year. At Nu-Heat, all systems must reach 21°c even when it is -3°c outside
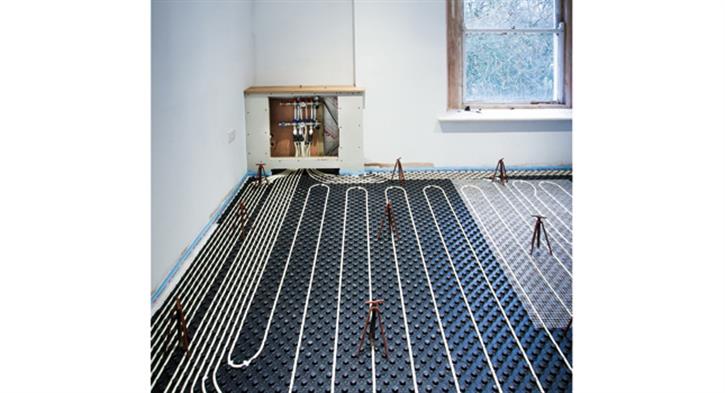
• Tube layout drawings
The tube layout, with manifold locations, helps with a quick installation. The flow temperatures and tube spacings determine the heat output of the system, ensuring that the UFH can heat the area effectively
• Floor coverings
The final floor finish can affect response times and heat outputs. If in doubt, the system design should assume carpet will be the chosen floor covering as this is the worst case scenario for UFH
• Zoning of the UFH
A good design will cover zoning of the UFH and how certain areas are controlled – particularly useful in open plan spaces.
• System schematic and electrical diagrams
These clearly illustrate how the boiler, hot water cylinder and any existing heating system (such as a radiator circuit if present) are connected.
SMALLER PROJECTS
If the UFH is being installed in a single area, such as a kitchen or new extension, there might not be the need for a full system design.
In this scenario, there are off-the-shelf UFH kits that can be bought online. The key thing to look out for here, aside from ensuring that all of the components needed will be supplied, is a clear manual, ideally with pictures of each stage. It might sound obvious, but a good manual is essential for a trouble-free installation and not all kits include one!
Spend some time reading through any installation guides and familiarise yourself with them before you get started. If you’re new to UFH, check that technical support is offered, just in case.
SMOOTH INSTALLATION
There’s a whole host of top tips to help you install a great UFH system quickly and simply. As you would expect, preparation is key and makes all the difference, whatever the project.
Suspended timber floors
There needs to be insulation beneath a timber floor. Without insulation, a large proportion of the heat generated will be lost downwards, creating an inefficient system. If tiles will be used on a suspended timber floor, the UFH panels will need to be screwed or glued down to the floor deck to stop any movement, preventing the tiles from cracking.
Newbuild application
The location of the insulation in the floor structure needs to be discussed early on. The ideal scenario with UFH is for the insulation to be between the sub-base and final screed, rather than below the concrete base layer, as this can affect the efficiency and warm-up time of the UFH.
Retrofitting over existing floors
The majority of retrofit UFH solutions use a type of board to hold the UFH tube in place. Before these panels can be laid, bear in mind that the floor will need to be in good condition and level. Consider the panel layout before starting, as some might need to be cut to size. Fixings are also important – some panels can be glued, but others will need to be screwed down depending on the system and sub floor.
Wet retrofit systems
New ‘wet’ retrofit systems offer a flexible installation and impressive performance.
As these use a self-levelling compound, you need to begin by carefully tanking the room/s to prevent any leaks. For suspended timber floors, use some mastic to fill any gaps. Skirting boards and doorframes should also be repaired.
If the UFH system is being installed in a kitchen, batten around spaces where any kitchen units will go or tell the designer that you would like to have self-levelling compound below the kitchen units, so that they can calculate the correct amount to supply. Battens will also need to be placed in doorways to stop the compound spreading into other areas.
Heather Oliver is product development manager at Nu-Heat.
If you'd like to keep up-to-date with the latest developments in the heating and plumbing industry, why not subscribe to our weekly newsletters? Just click the button below and you can ensure all the latest industry news and new product information lands in your inbox every week.
Subscribe to receive your free copy of HVP every month.